How to Connect DoxTract to Airtable for Document Workflows
Airtable is a natural home for document-heavy bookkeeping work — it's a real database with linked records, filtered views, and multi-client organization that a plain spreadsheet doesn't handle as well. Building a "Documents" table where every receipt or invoice becomes a structured, searchable, linkable record is a genuinely useful upgrade over a folder of PDFs.
One thing worth knowing up front: Airtable's native automations don't include a built-in, no-code "send HTTP request" action the way Zapier or Make do. To call an outside API directly from Airtable, the native path is the Run a script action, which means a few lines of JavaScript. If you want to stay fully code-free, routing through Zapier or Make instead is the cleaner option. Both are covered below — pick based on whether you're comfortable pasting a short pre-written script.
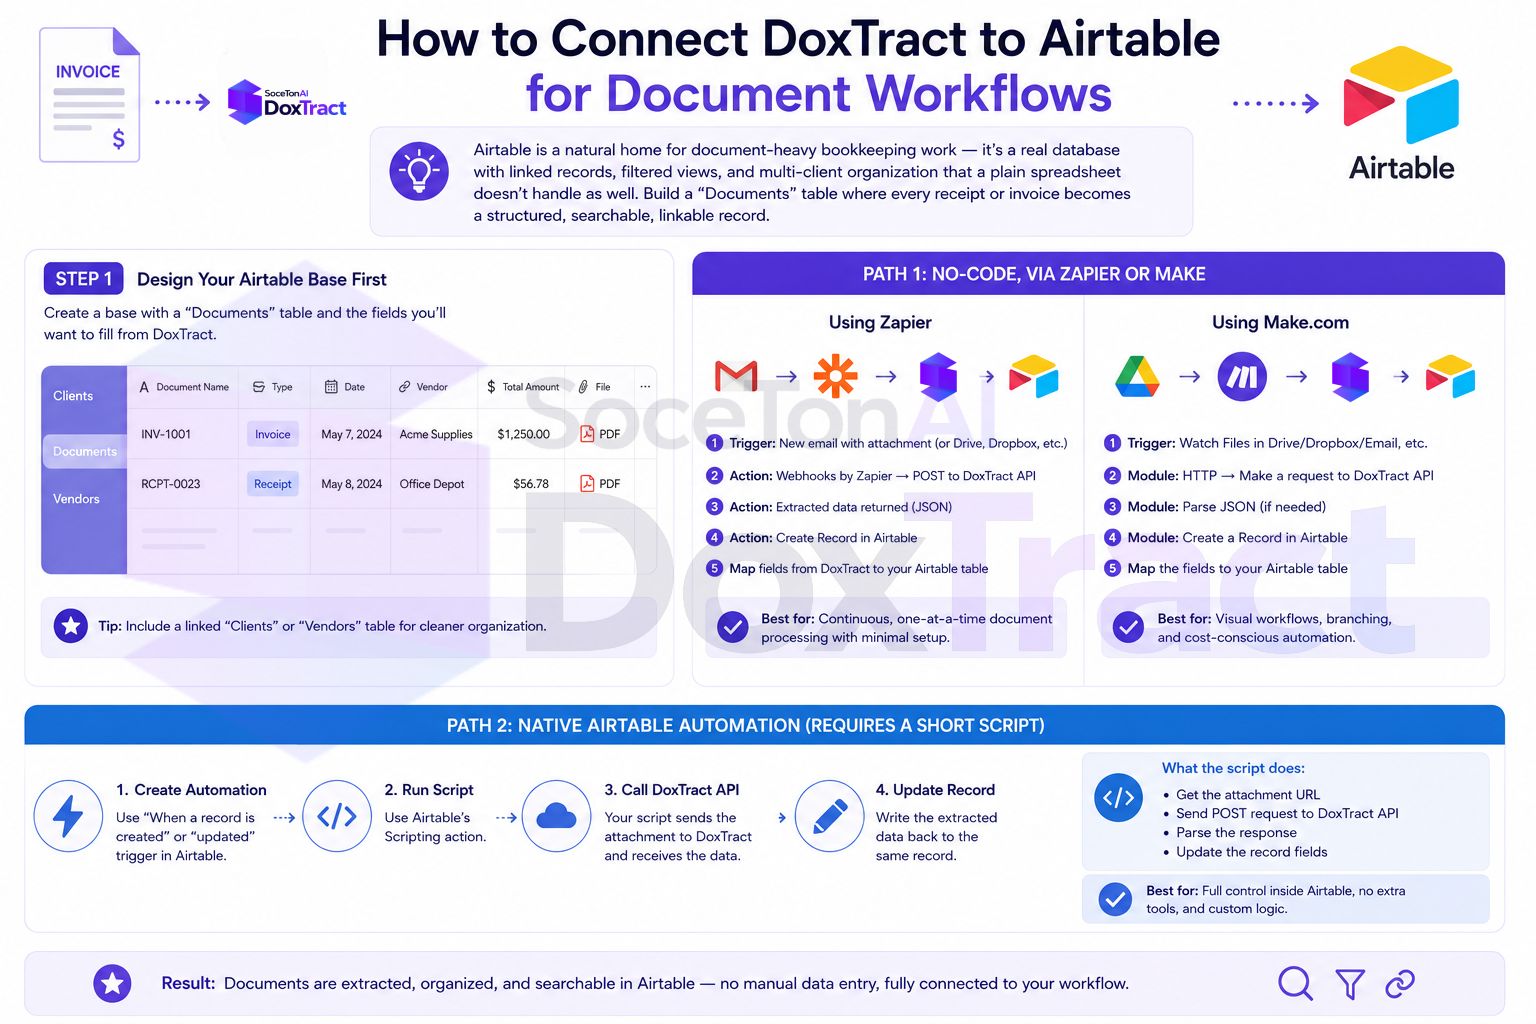
Step 1: Design Your Airtable Base First
Before connecting anything, set up the table extracted data will land in. A workable structure:
Documents table:
Client (linked record to a separate Clients table, if you're managing multiple)
Vendor (text)
Date (date)
Amount (currency)
Invoice Number (text)
Status (single select: Extracted / Reviewed / Imported)
Source File (attachment field — keep the original linked to its data)
Matching your Airtable fields to exactly what your DoxTract template extracts makes the mapping step in either path below far simpler.
Path 1: No-Code, via Zapier or Make
This is the cleaner option if you want zero scripting anywhere in the pipeline.
Using Zapier
Build your extraction template in the Template Editor — no signup needed to try it.
Set a Zapier trigger on wherever documents arrive (Gmail attachment, Google Drive new file).
Add a Webhooks by Zapier action (
POST) callinghttps://api.soceton.com/doxtract/api/read, with yourx-api-key/x-api-secretheaders and the file passed as form-data — the same setup as our Zapier invoice extraction guide.Add an Airtable — "Create Record" action as the final step, mapping each extracted field (vendor, date, amount) to the matching Airtable column.
Using Make.com
Same shape, different platform:
Trigger on a new file (Drive, Gmail).
Add an HTTP module (
Make a request) posting to DoxTract's/readendpoint — full field-by-field setup in our Make.com workflow guide.Add an Airtable — "Create a Record" module, mapping the parsed response fields to your table columns.
Either route: no code, and both Zapier and Make have first-class native Airtable actions, so the final "write to Airtable" step is simple point-and-click regardless of which automation platform you pick.
Path 2: Native Airtable Automation (Requires a Short Script)
If you'd rather not add a third platform to the mix, Airtable can call the DoxTract API directly — but only through the Run a script action, which needs a small JavaScript snippet using Airtable's built-in fetch.
Create an Airtable automation with a trigger — "When record created" (e.g., a row added with just a link to the source file) or "When webhook received" if you're pushing files in from elsewhere.
Add a Run a script action.
Use a script along these lines (adjust field names to match your base):
let table = base.getTable("Documents");
let record = input.config();

let response = await fetch("https://api.soceton.com/doxtract/api/read", {
  method: "POST",
  headers: {
    "x-api-key": "YOUR_API_KEY",
    "x-api-secret": "YOUR_API_SECRET",
  },
  body: JSON.stringify({ data: { template_id: "YOUR_TEMPLATE_ID" } }),
});

let result = await response.json();

await table.updateRecordAsync(record.recordId, {
  "Vendor": result.result.vendor,
  "Date": result.result.date,
  "Amount": result.result.total,
  "Status": "Extracted",
});
A few notes if you go this route:
Airtable's scripting environment has limits on fetch calls per run and execution time — fine for one-document-at-a-time automations, less suited to large batches.
File uploads through
fetchinside Airtable's scripting sandbox are more restrictive than a full server environment — this approach works best when the file is already accessible via a URL (e.g., an attachment field's public URL) rather than requiring a raw multipart upload.Store your API key and secret as Airtable automation input variables rather than hardcoding them directly in the script, so they're not exposed if the script is ever shared or duplicated.
Which Path Should You Use?
Zapier/Make — no scripting anywhere, more forgiving for file uploads, and you likely already have one of these for other workflows. The tradeoff is a separate subscription.
Native Airtable script — keeps everything inside Airtable and avoids a third-party cost, at the price of a short script to maintain and some real limits on file handling and batch size.
Most bookkeepers already running Zapier or Make for other client workflows will find Path 1 faster to set up. Path 2 is worth it mainly if you're intentionally trying to avoid adding another subscription to the stack.
Getting Started
Whichever path you choose, start with the template — build one in the Template Editor, no signup required, matching the fields you set up in your Airtable base. Check Pricing before running this against real documents; the free tier (200 pages/month) is enough to test either integration path first.