OCR API for n8n: Automating Document Data Extraction
n8n doesn't have a native DoxTract node, but that's a minor detail — n8n's HTTP Request node is built specifically for exactly this situation: calling any REST API as a first-class step in a workflow, with full control over headers, body, and authentication. For a self-hosted or workflow-heavy setup, this is often a more flexible integration than a purpose-built app node would be anyway, since you're not limited to whatever fields a native integration decided to expose.
This walkthrough builds a workflow that watches for new documents, extracts their data with DoxTract, and pushes the result to a destination of your choice.
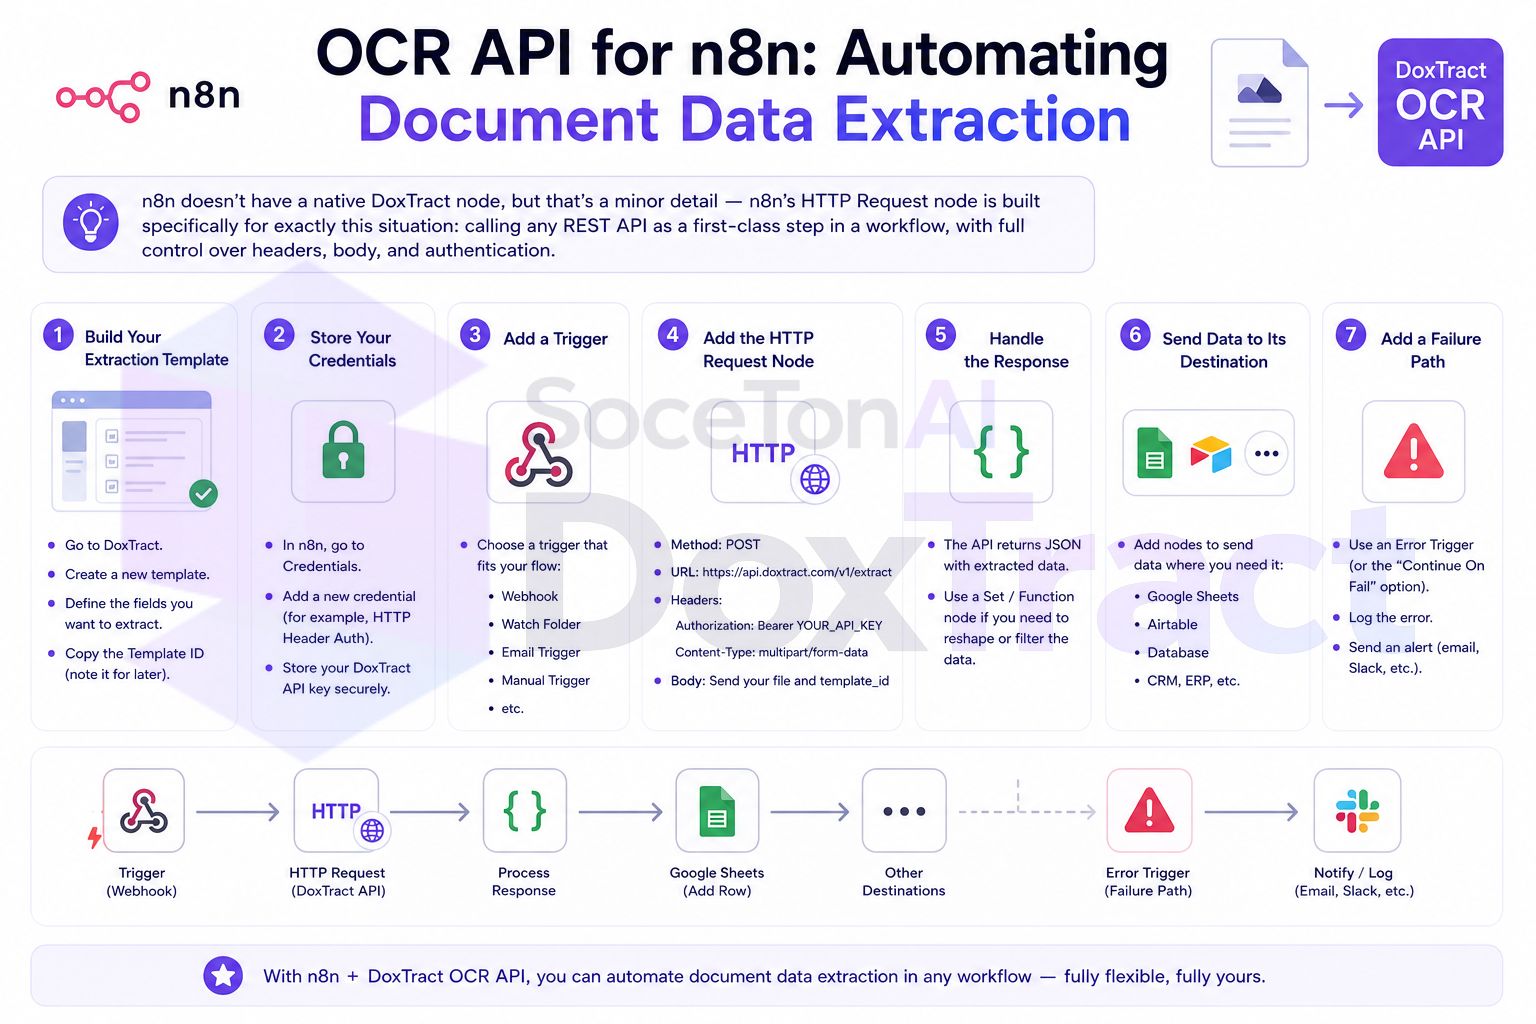
Step 1: Build Your Extraction Template
In the Template Editor — free to try, no signup required — upload a sample document and draw Fixed Header Box → Value Box pairs for each field you want extracted, including table columns for line items if relevant. Save it and note the template_id from the Doxtract App.
Step 2: Store Your Credentials
Rather than hardcoding your API key and secret into the workflow, set them up as n8n credentials:
Go to Credentials → New.
Choose Header Auth (or a generic credential type, depending on your n8n version).
Add two header entries:
x-api-keyandx-api-secret, with your DoxTract values.Save it with a recognizable name like "DoxTract API."
This keeps your keys out of the workflow JSON, which matters if you ever export or share the workflow.
Step 3: Add a Trigger
Start the workflow wherever your documents actually arrive:
Google Drive Trigger — fires on new files in a watched folder
Email Trigger (IMAP) — fires on new messages, useful for a dedicated receipts-forwarding inbox
Webhook node — if you're pushing documents in from your own upload form or another system
Step 4: Add the HTTP Request Node
This is the core of the workflow:
Add an HTTP Request node after your trigger.
Set Method to
POST.Set URL to:
https://api.soceton.com/doxtract/api/readUnder Authentication, select the "DoxTract API" credential you created in Step 2.
Set Body Content Type to
Form-Data (Multipart).Add a form-data parameter named
files, set its type to binary, and map it to the file data coming from your trigger node (e.g., the Drive file's binary property).Add a second form-data parameter named
data, type text, with the value:
{"template_id":"YOUR_TEMPLATE_ID"}Execute the node once with a real test file. For a single document, DoxTract returns the extracted data immediately in the response — you'll see it in n8n's output panel, ready to reference in the next node.
See API Tutorial.
Step 5: Handle the Response
n8n automatically parses the JSON response, so the extracted fields under result are immediately available to map in downstream nodes using standard n8n expressions, e.g. {{ $json.result.vendor }}.
If you're processing multiple files in a single execution (a batch trigger), DoxTract returns a job_id instead of an immediate result. Add a Wait node followed by a second HTTP Request node calling:
https://api.soceton.com/doxtract/api/jobs/{{ $json.job_id }}and loop that pair (Wait → check status) until status reads as complete — n8n's If node paired with a loop works well for this pattern.
Step 6: Send Data to Its Destination
Add a final node depending on where the data needs to go:
Google Sheets node — "Append Row": map each extracted field to a column.
Postgres/MySQL node: insert a row directly into a database table if you're building something more structured.
HTTP Request node again: POST the mapped fields to QuickBooks's Bill endpoint or Xero's Invoices endpoint if you want full automation straight into the books.
Step 7: Add a Failure Path
Real documents will occasionally fail extraction — a blurry scan, a layout mismatch. Use n8n's Error Trigger workflow (a separate workflow that catches failures from any other workflow) or an IF node checking the HTTP Request's status code, and route failures to a notification step (Slack, email) or a "needs review" destination instead of letting them disappear silently.
Step 8: Activate
Once a real test document flows cleanly from trigger to destination, activate the workflow. Spot-check output against source documents for the first stretch of real usage before trusting it fully unattended.
When This Beats the Dashboard
This node-based setup is worth the extra initial configuration when documents arrive continuously and you want zero manual steps, or when you need extracted data to trigger further logic (conditional routing, enrichment from another API, writing to multiple destinations at once) that a simple dashboard export can't do. For occasional batch processing, uploading directly to the Doxtract App and exporting a CSV is still the faster path — save the workflow-based approach for genuinely continuous or multi-step automation.
Getting Started
If you don't have a template yet, start there — the Template Editor is free to try without signing up, and the API tutorial covers authentication and the /read endpoint in more depth than this walkthrough does on its own. Check Pricing before pointing this at production documents; the free tier (200 pages/month) is enough to fully test the workflow first.